Saturday, February 21, 2015

Cursive Writing Using the Train-Trace-Try Method!

Cursive writing. Everyone has their opinions on whether to teach it to students or not. My personal opinion is that cursive writing is still important for kids. Even though it probably doesn't need as much emphasis as we've put on it in the past, there are several reasons why kids need to be able to read and write in cursive.

Here is a great article from TIME magazine that discusses 5 reasons kids should still learn cursive writing. Two of the most important reasons, in my opinion, include:

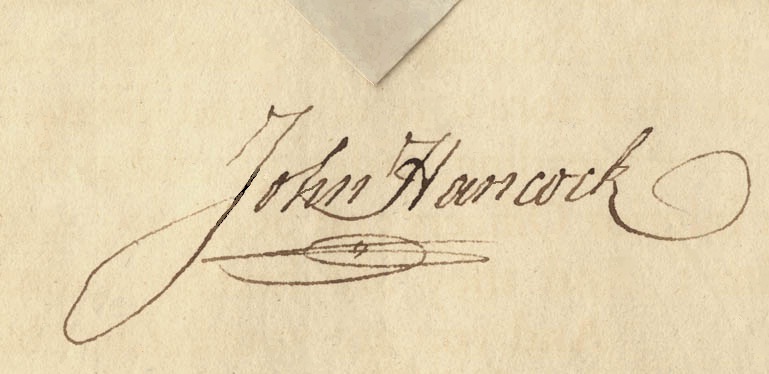
1. Students need to be able to sign their name on important documents, job applications, and more.


2. Kids should be able to read cursive writing for a variety of reasons. Letters from grandma, important historical documents, etc.

Okay, I'm getting off my soapbox now! For the past couple of years, I've been teaching cursive writing to my third graders. I didn't love the way I was teaching it and wished that I had more resources to use with my kiddos. So I started doing some research about the cursive writing verbal paths and other strategies to use with students and then put together a COMPLETE Cursive Writing Pack!


This pack is unique in the fact that it uses a strategy called Train-Trace-Try. I came up with these three words after thinking about how we need to scaffold cursive writing instruction. First, students need to be trained how to form each letter. This is where the verbal paths come in.


In the train step, students can either trace the letter with their finger or with a pencil but the most important part is that they are saying the verbal path in their head each time they form the letter. Saying this over and over again will help the kids remember the formation.

In the trace step, students can trace the letter several times.


I've actually found that it's more motivating to students to use a colored pencil during this step. They can see their writing easier and it's fun to use different colors! I encourage my students to still say the verbal path in their head as they trace the letters.


The last step on each page is to try. In this step, students will try to form letters and words on their own. This is an important step because the kids learn how to link the letters together to form words.


You can have your students use a regular pencil or a colored pencil for the step. I especially like the Crayola Erasable Colored Pencils


Also included in this Cursive Writing Pack are lowercase and capital letter posters to display in your classroom.


To see what all is included, check out the previews below! If you'd like to grab a copy of this cursive writing pack, click here!


Wednesday, November 5, 2014

Throw Those Math Key Words Out the Window!

Total. Difference. Left. Altogether. You know what I'm talking about. The math key words used to teach kids to solve word problems in math. I can picture a certain poster that I used to use when teaching these key words. It was all cutesy with locks and keys (smiling, of course!) and all the key words that would help you magically get the solution to any word problem. I'm going to challenge you to throw those key words out the window. They're not helping kids even though we have good intentions.

Think about the following word problem:

Brandon took 6 baseball cards that he no longer wanted and gave them to Benny. Now Brandon has 10 cards left. How many baseball cards did Brandon have to start with?

When we think of the word left, we typically associate it with subtraction. In the word problem above, however, addition is the operation that you would need to use to solve the problem. Teaching kids to rely on key words doesn't encourage kids to visualize the problem and think about it's structure. It merely teaches kids to hunt for words and solve without making sense of the problem.

Here's another example of how key words can be misleading:

Megan made $25 during the bake sale. Afterwards, she had to pay $5 for renting the table. What is Megan's new total of money earned?

Again, kids would see the word total and automatically assume that they need to add. However, adding the two numbers together wouldn't give a reasonable answer. This is why we need to get away from using key words and instead focus on the structure of the problem. Acting the problems out and getting kids to visualize the problem is helpful (and fun!) for students.

In the Common Core standards, teachers are encouraged to teach students the 5 common addition and subtraction situations. I like how this statement focuses on the word situations and not key words. The five common situations include: add to, take from, put together, take apart, and compare. I try to use these terms with my students from the beginning of the year and they are really helpful. Here's a brief explanation of each of the situations:

Add To: an amount is added on to another
Example- "I have 52 baseball cards. My friend gave me 37 more. How many cards do I have now?"

Take From: an amount is taken from another
Example- I had 145 baseball cards. I lost 25 of them. How many baseball cards do I have now?"

Put Together: two amounts are put together
Example- Sam bought 67 baseball cards. Max bought 32 baseball cards. How many cards did both boys purchase?"

Take Apart: the total amount is taken apart
Example- There are 238 trading cards at the store. 100 are baseball cards. How many are not baseball cards?"

Compare: two amounts are compared to see how many more or how many less
Example- Walmart has 115 baseball cards. Target has 102 baseball cards. How many more cards does Walmart have?

If you'd like a free set of posters matching these situations, click on the picture below. Enjoy! (And throw those key words out the window!)


Tuesday, November 12, 2013

Helpful Hints!

The teachers of Blog Hoppin' are hosting a week long linky party! I'm so excited to participate in today's linky- H is for Helpful Hints.

http://imbloghoppin.blogspot.com/2013/11/h-is-for-helpful-hints-linky-party.html

I've got three helpful hints for you today...


My students use to always argue over whose turn it was to be on the computer. We only have 3 student computers and 20+ students. I decided to assign each student a computer for an entire day. Each card has the student's name on the front and their individual login information on the back. The cards are hole punched and hooked together with a book ring. Each ring of cards hangs from a 3M hook on the computer. My students know each day whose turn it is for the computers and can even check to see when their next day is going to be. It's also really handy having their login information on the back of their card to eliminate questions, disruptions, etc. So easy!


Last year, I used one turn-in basket for all of my students' completed work. It was a nightmare! The basket would pile up, I'd have to sort the papers, and I'd get overwhelmed and procrastinate with grading (sound familiar?!) This year, I found this really neat 5-basket organizer from Really Good Stuff. I thought about labeling each basket with the days of the week but decided to organize them by subjects. I have mine organized into the following five categories: morning work, math, word study, reading, and other. This has been such a tremendous help in managing papers to grade. It's not so overwhelming and the papers are already organized at the end of each day. I love it!


We all know that classroom storage space is limited so we have to get creative when it comes to hiding storing all of our materials! An easy way to do this is to use the extra cubby space in your classroom. If you have a couple of empty cubbies, use a piece of fabric and Velcro to cover the extra space. You can store a ton of materials by doing this! Whenever you need something, just pull back the fabric, grab what you need, and velcro the fabric back on. It's so simple and looks cute too!

Alright, those are my helpful hints for today! Tomorrow I hope to blog about activities that I love to use in my classroom. Be sure to head over to Blog Hoppin' and check out all of the helpful hints being shared!

Monday, November 4, 2013

Using Trifolds in Guided Reading

Does anyone else struggle with holding your kids accountable for reading their guided reading chapter books? Or what about keeping them focused on a strategy while reading their assigned chapters on their own? These are two of the biggest issues that I face with my guided reading groups. To help with this problem, I started using trifolds to help keep my kids on track while they went back to their seat to read on their own. These have proven to be really helpful for my kids in so many ways. They now know exactly what to focus on when they are reading, they have opportunities to record their thinking, and we are able to have meaningful discussions about our reading when we meet as a guided reading group again.


Here are some tips for using guided reading trifolds in your classroom: (I'm not an expert, these are just things that work for me!)

1. Focus on a specific reading strategy for the majority of the book

This is something that I've learned over the years while teaching guided reading. Instead of changing the focus every chapter of the book, decide on a specific strategy to use for the majority of the book. This is less confusing for the kids and helps them focus on using the strategy over an extended period of time. Find a book that really lends itself to the strategy/skill that you are teaching. For example, in one of my groups we are focusing on inferring character traits. I thought about which book would really lend itself to teaching character traits and decided on Because of Winn Dixie. In this book, you really get to know the characters and there are lots of different traits that can be used to describe each one.

2. Explicitly teach each reading strategy/skill before using the trifold

A great way to do this is to use think-alouds. I love to read books aloud to my kiddos (during our reading workshop minilessons) and think-aloud for my students. It really models the thinking that goes on while reading. Before having the kids practice the skill independently on their own using the trifolds, allow them many opportunities to hear you think-aloud and to discuss their own thinking as a whole group. Once students understand the skill/strategy that you are teaching, you can have them try it independently using the trifolds in guided reading.

 
3. Plan for time in your guided reading groups to discuss each student's writing in their trifolds
 
Do you have times in guided reading when you ask the group a question (What is a summary of this chapter? How would you describe Winn Dixie?) and all you get is blank stares? Ahhh!! It drives me crazy! These trifolds allow you to have meaningful conversations with your students using the writing that they recorded while reading independently. Instead of the blank stares, students are looking at their writing and sharing their thinking with others in the group. This is so powerful! I always encourage each student to use evidence from the book to support their thinking (see the example below where a student referred to a part in the book and wrote down the page number). This makes discussing each chapter so much easier!


If you are interested in learning more about using guided reading trifolds, you can check out the product below that includes trifolds for 11 different strategies (character traits, character feelings, inferring, questioning, summarizing, making connections, making predictions, setting, unknown words, visualizing and sequencing). The download also includes posters to use while teaching each strategy. Just click on the picture below to see more views of everything that is included!
 
http://www.teacherspayteachers.com/Product/Guided-Reading-Trifolds-and-Strategy-Posters-For-Use-with-ANY-Chapter-Book-958201